I’ve made a few different magnet servers and have published two of them.
I use a lot of the 6x2mm neodymium magnets and it is crucial that they be installed with the correct polarity. This is the same size that fits into Gridfinity projects, but I use them for lots of other purposes, including the magnetic gears in the Spool Rotator.
Gridfinity Magnet Server
The first one I published was itself a 1×1 Gridfinity module. It mostly worked fine but it had a limited capacity.

To increase capacity I could have made a 1×2 or 1×3 version of the above, but I wanted to make a vertical stack of magnets. I found that the stack itself attracted the magnet being served and that led me to have a larger wheel to dislodge the magnet from the stack so it could be moved far enough away.
https://www.printables.com/model/500228-gridfinity-magnet-server
High Capacity Magnet Server
When I made one that would have fit on a 1×2 Gridfinity base it was too small to operate reliably. So, I made it bigger. This version works with 100+ magnets.
https://www.printables.com/model/777929-high-capacity-magnet-server


This device serves up 6x2mm magnets for use with Gridfinity baseplates and modules. They are always served up in the same orientation so their polarity is always the same. This helps avoid gluing magnets in the wrong orientation.
The magnets can stick out of the top of the stack without any risk of falling over or getting stuck. It can handle 100 magnets. If you want, you can scale the stack in the Z direction as much as you want (over 100%) for a taller enclosed stack, but it really isn’t necessary.
There is a tall slit in the column so you can see how many magnets remain when they are entirely within the stack.
Each served magnet ends up on top of a perch so it is in exactly the same place every time. They never fall out of or off of the device.
This model is loosely based on my original Gridfinity magnet server.
Required Parts:
- A 4x20mm cap screw (or longer)
- An M4 lock nut or an M4 Nut
- Two 6x2mm neodymium magnets
Assembly:
- Print one of each part
- Glue two magnets into the base that are in the same orientation (e.g. both North up or both South up). That is the polarity of the served magnets as well.
- Insert a bolt through the bottom of the base
- Slide the wheel over the bolt with the indentations facing upward
- Slide the stack over the bolt while aligning the hole at the back of the stack support with the pin at the back of the base
- Attach the lock nut over the top of the bolt – finger tight is enough
There is no need to glue any of the printed parts together. The two magnets are the only parts that get glued in place.
Optional Assembly:
You can make this magnet server operable by a single hand if you attach it to something heavy or otherwise secure it so it can’t move while it is in use. For example, you could clamp the back of the stack support at the back of the base, or you could glue it to something or you could even bolt it down through the center hole into something below like a bench top or a piece of wood. Bolts work very well in wood for an application like this.
Usage:
- Load magnets into the stack. The magnet in the base should attract the stack. If the stack bounces, turn the magnets over and insert them in the other orientation.
- If you haven’t secured the server, hold the back of the stack support with one hand.
- Rotate the large knurled wheel 180º in either direction to serve the next magnet.
- Remove the magnet from its perch.
You can see it in operation here:
1×2 Gridfinity Magnet Server
This 1×2 Gridfinity module holds a stack of 40 6x2mm magnets inside. Roll the thumbwheel and one magnet at a time is delivered to the top tray, always in the same polarity. You can operate the magnet server with one hand.
https://www.printables.com/model/790910-1×2-gridfinity-magnet-server


There are interior compartments, but if you fill them with magnets they will prevent the magnets from sliding forward to be served. Only the center compartment can contain magnets.

To assemble, print all three parts (bin, lid and wheel). Insert a magnet from the outside into the single magnet detent on the outside. That magnet determines the polarity of the pile you insert because the server will only operate when the stack is attracted to the exterior magnet.
Then insert the wheel so the pin fits into the slot. Finally insert a stack of up to 40 magnets. They must be attracted to the exterior magnet. Reverse them if they are repelled. Finally put the lid on. It clicks into place and won’t fall out. Use the indents on the sides of the lids to pull it off.
To use, simply rotate the thumbwheel. Remove each magnet as it is served. If more than a couple of magnets are in the tray they too can prevent the stack of magnets from moving forward to be served.
Prints without supports, but I print the lid with a 5mm brim.
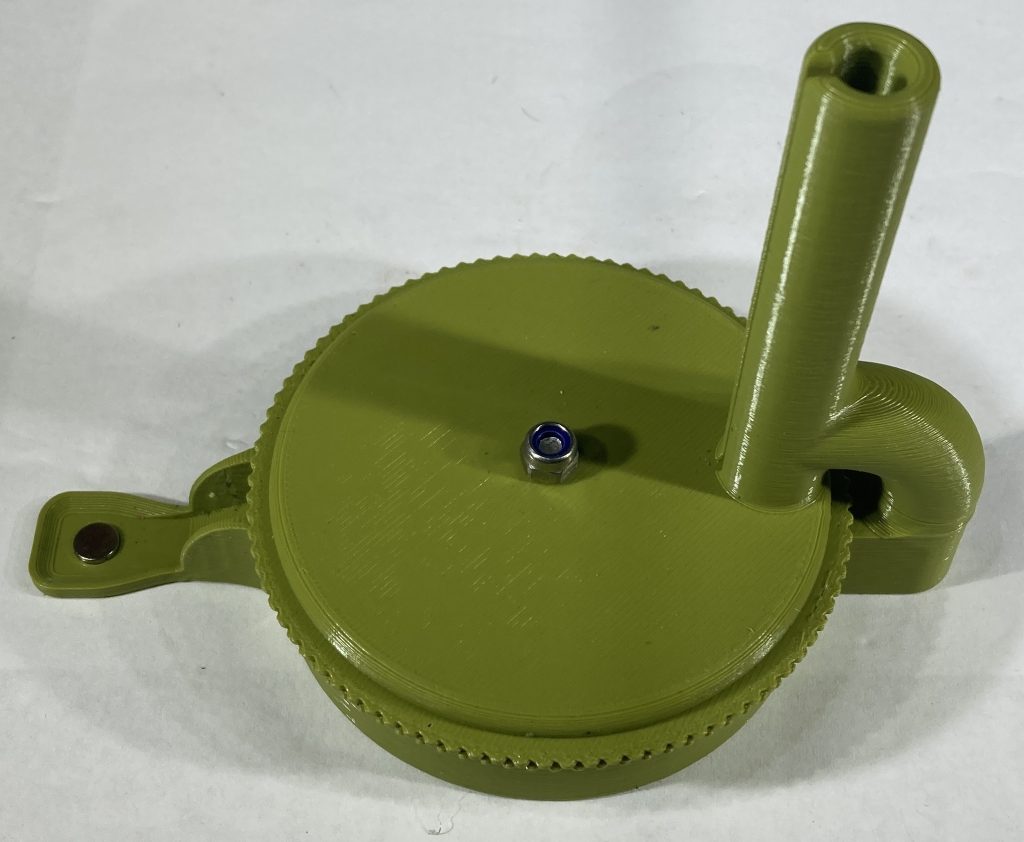
Failed Magnet Servers
Not all my magnet server designs worked.
I made this smaller version with a vertical stack. It had a smaller knurled wheel. It took more effort to rotate the wheel to break the bottom magnet away from the stack. These little neodymium magnets are pretty strong. The larger knurled wheel of the larger version is much easier to turn because you have twice as much leverage.

This smaller scale version never worked very well. The stack of magnets is just way too close to the magnet being served and it never goes down the ramp. It just gets jammed as close to the stack as it can get at the top of the ramp.
It also didn’t work when I put a magnet at the bottom of the ramp because the stack has a stronger attractive force than a single magnet at the bottom of the ramp. I did some experiments and anything less than 40mm away was unlikely to work well and anything less than 30mm seemed impossible to work. I definitely wanted it to operate consistently and that precluded the smaller designs.
I also learned a few interesting things in the design process:
- The top of the wheel needed to be slightly recessed where the magnet fits so it doesn’t catch the edge of the magnet above it in the stack.
- The magnet at the bottom of the ramp needs to be mounted less deeply so the served magnet comes off easily
- It is important to put a small hole under wherever the magnets are mounted so you could knock one out if it wasn’t glued in yet.
- A round alignment pin is better than a square alignment pin because the bolt and the pin guarantee alignment (two points determines a line)
- If there are two holes in the wheel, the exit ramp needs to be 180º from the stack. If there are three holes in the wheel the ramp needs to be 120º from the stack. This is so that there is a natural stopping point at just the right position for the served magnet to fall onto the ramp.
- The magnets are not uniformly 2mm thick.