If you are only changing the spool and not the pulleys then there is a simple way to do it that doesn’t involve the rubber band.
- Unload the filament from the printer and secure the end to the spool.
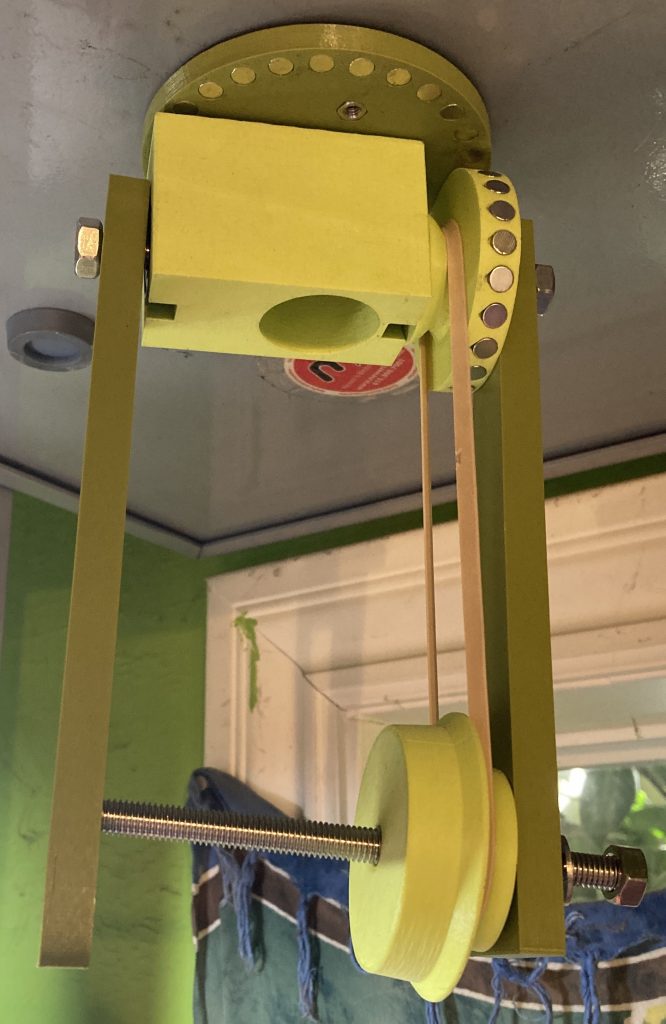
- Take the nut and washer off the bottom threaded rod on the side opposite to the rubber band.
- Pull the arm off the lower threaded rod – push the rod in further if the arm doesn’t come off easily.
- Push the arm back until it clears the side of the spool and place it between the two sides of the spool.
- Pull the spool away from and separate it from the SpoolPulleyFlange.
- Remove the spool fully by pushing the loose arm back and around the second side of the spool.
- Take the SpoolFlange out of the spool.
- Cut the end of the filament on the new spool with a side cutter so it is ready to load into the extruder, but don’t release it from the spool. It should remain secured to the spool.
- Put the SpoolFlange into the new spool.
- If the flange doesn’t fit snugly you’ll need to use one of the Spool Flange Sleeves on both sides of the spool. They prevent the spool from sliding on the spool pulley flange and ensure smooth operation.
- Push the loose arm out of the way and put the new spool in by putting the threaded rod through the SpoolFlange on the new spool, and pushing the SpoolPulleyFlange on the other side into the hub hole.
- Put the arm onto the end of the threaded rod and add the washer and a nut
- Release the end of the filament and feed it through a tube-type filament guide (with one or more extenders as needed) and then into the extruder.
- Pre-tension the spool rotator. Pull the filament a little bit to see which direction the rotator will go. Then take in the slack. Rotate it slowly, testing the grip of the magnetic gear at each point. Find the one it won’t stick to anymore, where it first retreats to the previous magnet. When the print begins it should begin rotating and not need to build up a lot of torsion first.